Design One
Welcome to Design 1! I am so happy to have you in my class and am looking forward to a great school year together.
Drawing 1 is an exploratory course that fulfills RHS graduation requirement for Visual Arts and is designed to offer a well-rounded background in art. Students will become familiar with a variety of art techniques, study art movements, and develop creative thinking. Our class is mainly project based, with some written assignments, homework, and quizzes. Class critiques and self-evaluations will occur often. Design 1 is designed for the beginning art student. The fundamentals of pencil, pen and ink, printing and painting are taught through demonstrations and student artwork. Other topics include color theory and design as well as processes such as printmaking, stencil, and collage. The class is project-oriented but will also incorporate art history and critiques. The course emphasizes both skills development and development of the creative thought process. All levels of talent are welcome!
In addition to projects, students will complete various “Creative Challenges”. The Creative Challenges (CC) are homework assignments to be completed in the students’ sketchbooks and are designed to exercise imagination, refine artistic skills, or reinforce ideas learned in class. They are to be completed outside of class, unless a student finishes early with a project, then the CC should be worked on. 30-45 minutes minimum should be spent on CC's.
Projects + Student work
Art Books
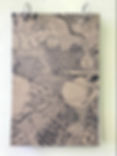
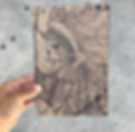
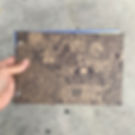
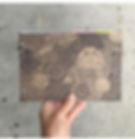
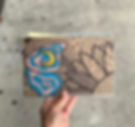
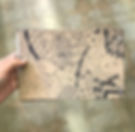
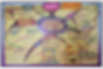
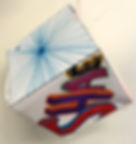
We will be constructing and decorating Art Books to hold all of the material we need for Drawing class. This includes handouts, skill building and Creative Challenges. To begin the year, you will need to bring in two pieces of 9"X12" cardboard to create the covers for your Art book. You will complete two worksheets prior to drawing your covers, to be turned in at the completion of the project.
Directions:
-
Use your Symbolism worksheet to draw your 5 symbols on your cover. Any place, any size, anywhere!
-
Use your “Lines like” worksheet to add in unique lines patterns around your symbolism.
Rubric:
-
All 5 symbols appear at least once: 30 points
-
More ink than paper: 30 points
-
Complete 2 covers by due date: 20 points
-
Completion of "Symbolism" and "Lines Like" worksheet (20 points/ 10 points each)
Total: 100 points
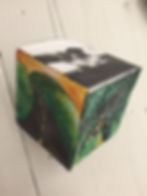
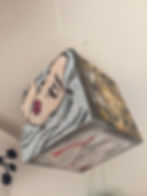
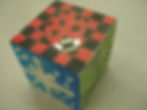
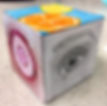
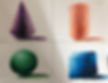
Elements of Art Cube
The Elements of Art are the "ingredients" of art and are essential to be able to analyze, process, discuss and understand art. The Elements and Principles of Design ARE what art is! Get comfortable with speaking about them. You will find your appreciation of art grow due to your ability to understand and process what you are seeing, and you'll find your own art develop into deeper levels. On each side of the cube project, choose at least one element to demonstrate. Glue it together and you've got an awesome piece of art that is also very educational!
-
Mixed media! Use at least 2 dry medias, for example: makers, crayons, collage, colored pencils,etc.)
-
No blank, boring, white space
-
Be creative and inventive with your examples
-
Construct the cube as neatly and nicely as you can so that it holds it's shape and looks sharp
Rubric
1. Use of one Element of Art on each side: 4 points per each vocabulary word (20 points)
2. Use of two dry materials: Example= colored pencils and pens (10 points)
3. Workmanship: Time and effort spent completing the assignment
-Put together well and no areas are left blank (10 points)
4. Creativity: Demonstrates unique examples and ideas to illustrate the Elements of Art
-Examples not copied from the handout or slides (10 points)
TOTAL= 50 points


Drawing Packet
The drawing packet is a general introduction to different techniques and new ways of seeing. Most are not "finished products," but are exercises meant to train artists to see relationships in whatever they are viewing and attempting to draw. Often a shift in the way you see something can dramatically impact and improve what ends up being put down on the paper. These short activities are sure to fine tune your eyesight and mindset, as well as expand control over your drawing abilities .
1. Drawing the doodle (10 points)
2. Blind and Modified Contour warm-up (20 points)
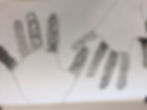
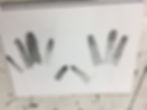
3. Blind Contour hands + watercolor background (20 points)
4. Upside Down Drawing of Pablo Picasso's Igor Stravisnksy (10 points)
5. Face/Vase (10 points)
6. Scissors: Contours line and Positive/Negative Space (10 points each)
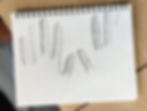
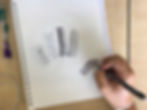
7. Forms Handouts- Cylinders, Spheres, Cubes/Rectangular Prisms, Cones (10 points)
8. Value Scales: blended pencil, crosshatch, colored pencil (10 points)
9. 4 Forms labeled with the six elements of shading (5 points each / 20 total)
Total =120 points
Layers and Holes
In this optical illusion project, you will be working to accomplish these learning goals:
-
Control pressure while shading
-
Value gradation
-
Blending shading techniques
-
Manipulate value to achieve an illusion of depth
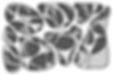
Create a 4+ layer abstract design with an illusion of depth by applying different values! Think of a stack of 4 sheets of paper with large cutouts. Each sheet (layer) creates its own drop shadow, each layer is slightly darker in value as you go from the top to the bottom.


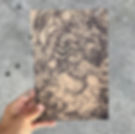
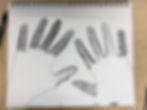
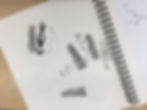
Pen Practice: Texture!
As we begin utilizing the drawing pen as a new material, let's explore how we can create value and texture with a thin, black pen line. Let's brainstorm a bit!
First, complete the value scales handout. Start with creating a very dark box using one of the pen techniques we discussed. Each box there after should be a little bit lighter until you reach the opposite box from the darkest.
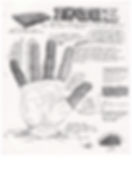
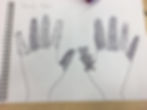
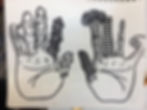
Next, trace both your hands in your sketchbook in LIGHT pencil. Then, create texture on each of your ten fingers: each finger should look like it is made up of different textures. Tips: Don't just draw on top of your fingers. Use the pen lines to round out each finger, meaning add value. Try to make it look like that finger grew hair, or made up of bricks, or became sticky...


The Creature Project
As Halloween approaches, we will take a look at aliens from film or television, gargoyles, insects, animals or mythological creatures. You will use these creatures and animals for inspiration to create your own monster! Do not copy a single source but use your favorite parts and qualities from many creatures. Feel free to do your own exploration and research to build the perfect creature, complete with numerous types of texture.
Project Steps:
1. Practice pen + value scales. Complete the texture hands.
2. Research monsters, insects, etc.
3. Complete the Monster Bio.
4. Brainstorm concepts for your monster.
5.. 2 Thumbnail sketches.
5. Sketch monster onto final paper (pencil)
6. Add values and textures.
7. Complete in micron pen.
Rubric:
-
Demonstrate your ability to create at least 3 different kinds of various textures (20 points)
-
Your creature should show a range of values (at least 5 visible) (15 points)
-
Creature is truly original and of your own creativity and imagination (10)
-
Superb craftsmanship. Project is complete, final paper is not torn or creased in any way (20 points) (15 points)
-
Newspaper Announcement (20 points)
-
Class time was used wisely and responsibly (20 points)
Zentangles
A zentangle is an abstract drawing created using repetitive patterns. It is usually structured within a particular shape. Drawing a zentangle is entertaining, relaxing and a great way to express your creativity!
We will be incorporating our understanding of the Principles of Art as we create our own zentangle patterns. Our project will include creating block letters that have zentangle patterns within them. Begin by using dafont.com to find an interesting and appealing block letter font to create. Or, draw your own!
See the attached PDF for instructions and more examples.
Rubric:
1. Choose at least 5 letters, bold and block in form.
2. Letters are evenly spaced out and are all the same size.
3. String divide the letters into sections, within each contain a different tangle- at least 6-7 tangles per letter.
4. Use 3 tangles (with titles) from resource books.
5. Bonus: Add value.
Total: 75 points
10 Boxes in One-Point Perspective
A great way to start out practicing drawing perspective is to do something simple, like boxes floating in space.
Throw in some shading to make this exercise even more dynamic. Including in your drawing...
-
A horizon line
-
Vanishing Point
-
10 boxes (make different, geometric forms)
-
Overlap at least 3 objects
-
One form with a hole in it
-
Some above and below the horizon line
-
Pick/label light source and shade all sides either dark, middle, or light value
-
At least 5 forms should be shaded with colored pencil
Total = 50 points
Want to see a step-by-step to make irregular forms in one point perspective? Watch this tutorial!
Khan Academy: An Intro to One-Point Perspective
Room Interior: One Point Perspective
Continuing our practice of one-point perspective we will design the interior space of a room. This could be an actual room from your house, a dream house, or an surreal room that doesn't exist!
-
Begin with finding the horizon line and vanishing point! Then, create your back wall. (Refer to the Khan Academy video)
-
Create your floor and ceiling- Will you have a wood floor, tiles, carpet? What does your ceiling look like?
-
Include at least 10-15 objects that require the use of 1 point perspective and space them out on the walls, floor, etc.
-
Pick a light source and add value to ALL objects
-
Show textures! (example: fuzzy carpet, wood or tile floors, brick walls)
-
Add colored pencil- Use colors + black + white to achieve value
-
Participate in class critique: receive feedback and contribute to classmates' artistic progress
Total = 150 points
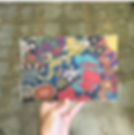
Magazine Mosaics
Mosaics use tons of tiny, individual pieces of color to come together and visually form whole, complete picture. But who says a mosaic must be with tiles or glass?! Try one with tiny ripped or cut pieces of magazines. The work is tedious, but the finished result is stunning! To do this project, find a picture of your spirit animal! Print it out, measure to the nearest whole inch, and grid with 1 inch boxes. Use a ratio to find a new, larger paper size: your 4X6 photo will be made into a 16X24 inch project. Next, grid the larger paper and redraw image. Use magazine clippings to recreate the colors of the image. Make sure to not leave any blank space.
Take this BUZZFEED quiz to find your spirit animal! Or choose your own!
Rubric:
-
Accurate drawing of image (proportions). Use the grid method to help you! 25 points
-
Use magazine paper to create color! Be sensitive to subtle and slight color changes!
-
Be hyper aware of every gradual change in color. This is KEY. 35 points
-
Be as neat as possible, no blank, white paper showing through the magazine pieces, no pieces flapping or falling over.
-
Keep it smooth and pieced together. 20 points
-
Participation in critique and completion of personal reflection. 20 points
Total = 100 points
Check out artist Shelley Schenker for inspiration!
Creative Colorwheels
In class, we've learned all about Color Theory, including the color wheel, what the primary, secondary, and tertiary colors are, what color schemes are, and what tints, tones, and shades are.
Now it's your turn to practice creating all these! Make your own "color wheel" into some other interesting design. Thinking of how to display all 12 colors, and their tints, tones, and shades, is crucial here: think outside the box and try to do what nobody else is doing. Make sure to do many layers of oil pastel to prevent streakiness, be neat and clean, and fill in your background with something neutral to compliment but not distract from your awesome colors (think something using black, gray, or white).
Rubric:
-
Demonstrates understanding of primary, secondary and tertiary colors by creating and placing each color in its appropriate place on the "wheel": 20 points
-
Creatively design a color wheel that shows "out of the box" thinking: 10 points
-
Uses colored pencil techniques, layering and mixing colors: 15 points
-
Drawing paper is clean and not creased or smudged: 5 points
Total: 50 points
Mandalas
Intricate geometric compositions created on a base of a circle, known as mandalas, have a deep spiritual meaning in Hinduism and Buddhism. They represent the whole of the universe, and they can be used as an exercise or for meditation. Recently, the basic idea of drawing a radial pattern has been also adopted by the Western world, as a tool for therapy or simply relaxation.
We'll be using our understanding of color theory and patterns to create beautiful drawings of mandalas. No two will be alike!
Rubric:
-
Complete colored pencil practice
-
3 sketches for possible mandala designs
-
Asymmetric design with rounded edges
-
At least 5 different shapes (keep it simple)
-
Neatly drawn lines within each section
-
Tints and shades for EACH color using colored pencil techniques
Total: 100 points


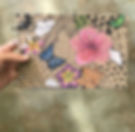
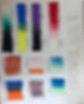
Watercolor Techniques
My favorite part about watercolor is all the exciting techniques you can use. There are countless ones to try! Recreate the watercolor techniques I demonstrated in class. Divide up a large piece of watercolor paper into 12 portions using masking tape to demonstrate your use of each technique. Label each one in each.
-
4 values of one color (separate each one)
-
Wet-in-wet
-
Dry Brush
-
Salt
-
Plastic Wrap Blot
-
Tissue Blot
-
Wax Resist (with white crayon)
-
Graduated Wash
-
Stippling dots
-
Dripping
-
Pen and Ink
-
Transparency
Total = 50 points (4 points each)
Watercolor Calendars
Now let's use your new pen and watercolor skills to make a fun, useful watercolor calendar! Perfect for starting out next school year!
STEPS:
1. Brainstorm a theme in your sketchbook. Your theme should be cohesive and clear throughout your 12 month calendar. Check in with Ms. U before beginning!
2. Lightly begin sketching in pencil. Sketch a different design or theme for each month of the year. You should also sketch out the days section. This will be your outline.
3. Add in an interesting font for your lettering. Use the website dafont.com to create lettering for the days and months of the year! Let's go beyond our normal, everyday handwriting, and choose a style of font the COMPLIMENTS and GOES WITH your theme.
4. When you're satisfied with your drawings, trace over your contour lines in pen. Add value by hatching, cross hatching or stippling. Add texture using the ideas from your fingers!
5. Erase ALL pencil!
6. Add watercolor. You should show your ability to create value with both the pen and watercolor.
7. Attach all months together using twine, ribbon, string, etc.
Rubric:
-
Have a creative, unique theme throughout. No hearts and stars, flowers and rainbows. Make it interesting! Is your theme immediately evident to the viewer?
-
All 10 months to represent the academic calendar: August-June.
-
Must demonstrate understanding and ability to show value and texture within drawings
-
Be creatively woven/attached/tied together to be hung on a wall- choose something that compliments your theme
-
Neatly have months/days written in ink, with a SPECIFIC font style that you looked up on dafont.com.
-
At least 50% of each page should be taken up by watercolor, avoid too much blank, white space
-
Use as least FOUR (4) watercolor techniques (in total over the 10 months) that we tested out in class
Total = 100 points
Oil Pastel
Oil pastel is a drawing stick made from a special combination of pigments, oils and wax. It is extremely easy to use. You can apply it directly to paper or use various techniques such as blending, overlaying, scratching, and color gradations to vary its effects. By using any of these techniques individually or together, you can develop your own style of drawing.
There are countless ways that pastels can be applied to a drawing surface. You should choose the technique that is appropriate for the desired effect. For nearly all pastel drawings, a combination of these techniques will be used.

Stippling is similar to the watercolor technique of stippling. Thick dots of oil pastel are layered over the top of various areas within the composition. These dots can also be circles, which is called "scumbling". Scumbling creates even more texture. These areas may have already received an application of pastel or they may be partially covering the raw surface of the paper.
Sgraffito is a technique where layers of oil pastel are built up, then scraped away to reveal the colors underneath. You can use the tip of a paper clip or a plastic fork to create sgraffito.
Perhaps the most common technique for applying pastels is blending. Blending occurs when pastels are applied in layers on a surface. Transitions between colors and values are smoothed by smearing or rubbing the pastel into the surface. The results are smooth gradations of value and color on objects.
Feathering is a technique in which the oil pastel is added in the direction of contour lines. The lines should follow the contours of the subject, adding to the illusion of form. Feathered lines may overlap, cross over each other, or be wide. Generally, the lines are short, but this is not a rule.
Feathering is simply another way of applying pastels through layers of color. With each linear application of pastel, the color grows in depth and communicates the form of the object more clearly. Mix colors!
Practice:
Color Theory AND Oil Pastel in your sketchbook
Try each technique in your sketchbook: blend, stipple, scumble, scraffito. AND blend to create color combinations: tint, shade, secondary, compliment.
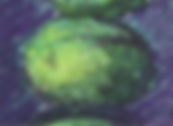
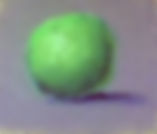
Practice creating VALUE in oil pastel using forms. Draw the sphere and one other form of your choice. Use tints and shades to show value!
Drawing with Yarn: Weaving!
Create a weaving using yarn, string, rope, and fabric. Your "loom" will be made out of cardboard, with string wrapped around the top and bottom (inserted into grooves every 1 inch), creating the "warp" threads. Using an over-under pattern, weaving your yarn through the warp strings. The horizontal weaving of the yarn is called the "weft". Alternate colors and textures to design an interesting piece, pleasing to the eye. A stick, woven through the top and bottom of your weaving (after being cut off the loom), will help the weaving maintain its shape and make it sturdier.
Rubric
-
Create a Pinterest board with at least 15 different weavings pinned. Be sure to email me the link to your Pinterest for credit! (20 points)
-
Your board should be similar to this one ------------------>>>
-
-
Craftsmanship: Warps and wefts are pulled tight, the weaving can hold itself together and is strong. (50 points)
-
Design/Color: Attention and care is shown to the detail and pattern created in the weaving. Colors, texture, and overall design is pleasing, interesting, creative and required planning, skill, and diligence. What did you try to do that was different than everyone else's? How is your weaving unique? Show me that you tried something different! (50 points)
-
A stick, wooden rod or similar reinforcement has been inserted into the top of the weaving to strengthen the piece and make it possible to hang securely. (30 points)
Total = 150 points
Notans
As we continue our exploration of the Principles of Art (Design), in this project we will be focusing on contrast, and the idea of positive and negative space. See the PDF for directions on how to complete your Notan project.
Check out this YouTube video for step-by-step instructions for your notan!
Rubric:
-
Geometric Notan: 20 points
-
At least 2 shapes per side
-
Shapes are neatly drawn, cut and glued to background
-
No pencil or glue marks
-
-
Organic Notan: 30 points
-
More complex, detailed
-
At least ONE recognizable image or shape
-
Shapes are neatly drawn, cut and glued to background
-
No pencil or glue marks
-
Total: 50 points